Web
How to Preview Ghost's Drafts in GatsbyJS (Part 1)
This is a three-part tutorial on how to preview Ghost’s drafts, from the beginning to production. Even though you’ll be using Gatsby, you can transpose these concepts to any other static site generator, as well as to any other CMS.
Tutorial outline:
- Bootstrap the project (you are here 📍)
- Implement the preview page
- Get ready for production
Set up Gatsby
The fastest way to get up and running with Gatsby is to clone a starter. There’s more or less a starter for every CMS and, you can bet, there is one for Ghost too. Assuming you have Node installed, run the following commands to initialize your repository.
npm i -g gatsby-cli
gatsby new my-ghost-website https://github.com/TryGhost/gatsby-starter-ghost.git
cd my-ghost-website
By default, the Ghost starter pulls its data from a Ghost demo available online. If you fancy a test drive with some sample data, you can start the development server by typing gatsby develop.
Install Ghost
As documented in the docs, there are several ways to start using Ghost, ranging from the purchase of a Ghost Pro subscription to the compilation from source. You can pick any of those. However, if you value portability and have Docker installed, keep reading: I’ve got you covered.
Unlike what the official Docker Hub image suggests, we’re going to skip the database configuration. Instead, we’ll let Ghost fallback to an SQLite store. With this quirk in mind, create a file called docker-compose.yaml, and paste in the following content:
version: "3.1"

services:
  ghost:
    image: ghost:3-alpine
    ports:
      - 3001:2368
    environment:
      url: http://localhost:3001
    volumes:
      # Redirects and database data
      - .ghost/data:/var/lib/ghost/content/data
      # Uploaded images
      - .ghost/images:/var/lib/ghost/content/images
This approach has many shortcomings, which are out of the scope of this article, but it also packs a lot of power in very few lines, which is essential for fast tinkering and prototyping.
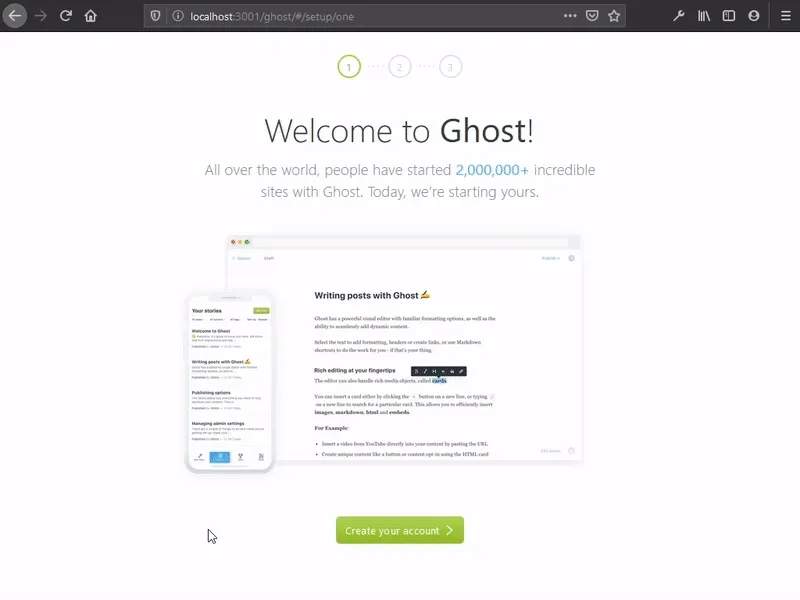
Lastly, run docker-compose up -d from the root of your project and navigate to http://localhost:3001/ghost to complete the setup.
Connect Gatsby to Ghost
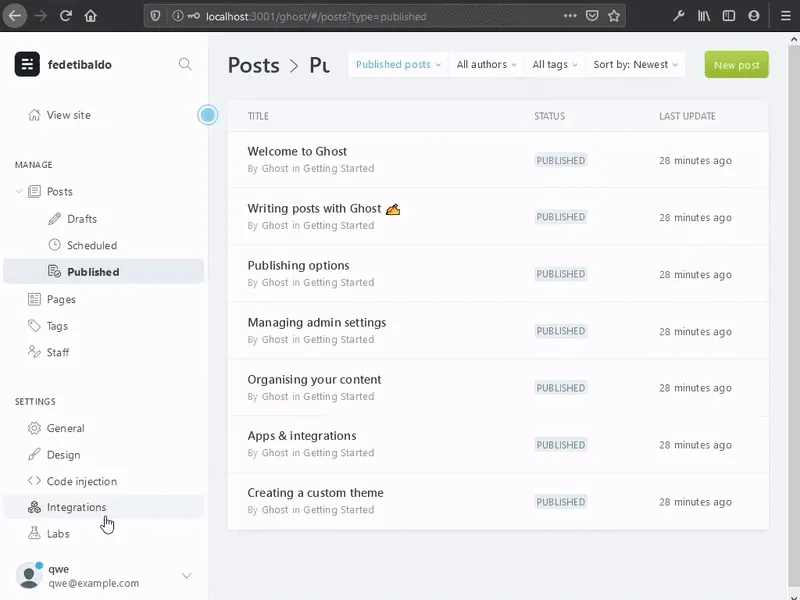
Gatsby uses the Ghost content API to fetch its data. However, the latter is secured by a random key. To generate a new one for Gatsby, you’ll need to create a custom integration. From your admin dashboard, navigate to Settings > Integrations, then click on the Add custom integration button. Choose a name and hit Create.
Now, copy the content API key and open the .ghost.json file at the root of your project. Here, replace the default key with the one you copied, and update the API URL to match your Ghost network location. If you’ve followed along, the correct value should be http://localhost:3001.
And you’re done! Feel free to poke around and make yourself comfortable with the project. Anytime you need to start the development environment, remember to execute these two commands.
docker-compose up -d
gatsby develop
Wrapping up
If you’ve made it this far, congrats 🥳, you’re now ready to implement a seamless preview experience! When you’re set, continue to the next part of the tutorial.